-
How do Air Conditioning Units Take Care of Ventilation? Is It Really Confusing?
In this comprehensive article, we will delve into the world of air conditioning units and explore the critical role they play in ensuring proper ventilation. Ventilation is an essential aspect of maintaining indoor air quality and creating a comfortable environment. We, as experts in the field, will shed light on the intricacies of air conditioning systems and how they address ventilation concerns. Let’s dive in and demystify any confusion surrounding this topic.
Understanding the Significance of Ventilation
Ventilation refers to the process of exchanging indoor air with fresh outdoor air. It is crucial for various reasons, including:
- Air Circulation
Ventilation ensures a steady flow of air throughout indoor spaces, preventing stagnation and maintaining a healthy atmosphere. - Temperature Regulation
Proper ventilation helps regulate indoor temperatures, especially in hot and humid climates, by facilitating heat dissipation. - Moisture Control
It aids in managing moisture levels, preventing the accumulation of condensation, which could lead to mold and mildew growth. - Indoor Air Quality
Ventilation eliminates indoor air pollutants, such as dust, allergens, and volatile organic compounds (VOCs), promoting cleaner and healthier air for occupants.
The Role of Air Conditioning Units in Ventilation
Air conditioning units are not solely designed for cooling spaces; they also contribute significantly to the ventilation process. Let’s explore how they achieve this:
- Air Filtration
Modern air conditioning units come equipped with filters that capture dust, pollen, and other contaminants, enhancing indoor air quality. These filters prevent pollutants from recirculating in the air, ensuring a fresher and cleaner environment. - Ventilation Modes
Many air conditioners have dedicated ventilation modes that allow them to bring in outdoor air. This mode is particularly useful when outdoor conditions are favorable, and it helps refresh the indoor air without relying solely on recirculation. - Dehumidification
High humidity levels can make indoor spaces uncomfortable and promote the growth of mold and mildew. Air conditioning units have dehumidification capabilities, which reduce moisture levels, contributing to a more pleasant and healthier environment. - Air Exchange Rate
The air exchange rate represents the number of times an air conditioning unit replaces the indoor air with fresh air from outside within a given time. High-quality air conditioners have an optimal air exchange rate, ensuring efficient ventilation. - Exhaust Systems
Certain air conditioning units are integrated with exhaust systems, enabling the direct expulsion of stale indoor air to the outside. This feature is especially beneficial in areas with poor outdoor air quality.
Addressing Common Misconceptions
- Air Conditioners Don’t Provide Fresh Air
One misconception about air conditioning units is that they only recirculate indoor air. While older models may have lacked dedicated ventilation modes, modern units are designed to incorporate fresh air intake, significantly contributing to ventilation. - Air Conditioners Cause Indoor Air Pollution
Another misconception is that air conditioners contribute to indoor air pollution. This notion arises from the assumption that recirculated air contains pollutants. However, with proper maintenance and regular filter changes, air conditioners can effectively improve indoor air quality. - Air Conditioning Units Are Energy-Intensive
While it’s true that air conditioners consume energy, advancements in technology have led to more energy-efficient models. Manufacturers now prioritize eco-friendly designs, helping reduce the overall environmental impact.
Tips for Optimizing Air Conditioning Units for Ventilation
To maximize the ventilation benefits of your air conditioning unit, consider the following tips:
- Regular Maintenance
Schedule regular maintenance for your air conditioner, including filter replacements and cleaning. This ensures optimal performance and better indoor air quality. - Utilize Ventilation Modes
Take advantage of ventilation modes on your air conditioner, especially during mild weather conditions, to introduce fresh outdoor air into your living spaces. - Temperature and Humidity Control
Adjust your air conditioner’s temperature and humidity settings to create a comfortable and well-ventilated indoor environment.
Conclusion
Air conditioning units play a vital role in ventilation by improving indoor air quality, regulating temperature, and controlling humidity levels. They have evolved significantly over the years, and modern units are designed to prioritize both cooling and ventilation. By debunking common misconceptions and providing essential tips, we hope this article has clarified the relationship between air conditioning units and ventilation.
- Air Circulation
-
How to Keep the Upstairs of a Home Cool in Summer?
When the scorching summer heat arrives, one of the challenges homeowners face is keeping the upstairs of their homes cool and comfortable. Rising temperatures can make the upper levels of a house unbearably hot, leading to discomfort and higher energy bills. In this comprehensive guide, we will explore various effective strategies and tips to help you maintain a cool and pleasant environment upstairs during the summer months. With these actionable solutions, you can create a refreshing oasis in your home and enjoy the season to its fullest.
6 effective tips to maintain a cool environment upstairs during the summer months
Optimize Insulation and Ventilation
To combat the heat upstairs, it’s essential to ensure proper insulation and ventilation throughout your home. Here are some key considerations:
Insulation
- Evaluate Your Insulation: Start by assessing the insulation in your walls, attic, and ceilings. Insufficient or outdated insulation can contribute to heat transfer, making the upstairs warmer. Consider upgrading to modern insulation materials like foam or fiberglass, which offer better thermal resistance.
- Seal Air Leaks: Identify and seal any gaps, cracks, or leaks in windows, doors, and walls. These air leaks can allow warm air to enter your home and cool air to escape, impacting the overall efficiency of your cooling system.
Ventilation
- Utilize Natural Ventilation: Take advantage of natural airflow by opening windows strategically. Create a cross-breeze by opening windows on opposite sides of the house to encourage air circulation. Use window fans or venting skylights to enhance the airflow.
- Install Attic Ventilation: Adequate attic ventilation is crucial in preventing the buildup of hot air. Install ridge vents, soffit vents, or attic fans to promote proper air exchange and reduce heat accumulation.
Enhance Air Conditioning Efficiency
An efficient air conditioning system is key to keeping the upstairs cool. Consider the following tips to optimize your cooling system’s performance:
- Regular Maintenance: Schedule annual maintenance for your air conditioning unit to ensure it operates at peak efficiency. Clean or replace air filters regularly to maintain proper airflow and reduce strain on the system.
- Programmable Thermostats: Install programmable thermostats to adjust the temperature based on occupancy. Set higher temperatures when the upstairs is not in use to save energy and lower costs.
- Zoning Systems: Consider installing a zoning system that allows independent temperature control for different areas of your home. This way, you can focus cooling efforts on the upstairs during the summer, preventing unnecessary cooling of unoccupied spaces.
Utilize Strategic Shading Techniques
Proper shading techniques can significantly reduce heat gain and keep the upstairs of your home comfortably cool. Here are some effective strategies:
- Exterior Awnings or Shades: Install exterior awnings or shades on windows facing direct sunlight. These shading devices can block a significant amount of solar heat, preventing it from entering your home.
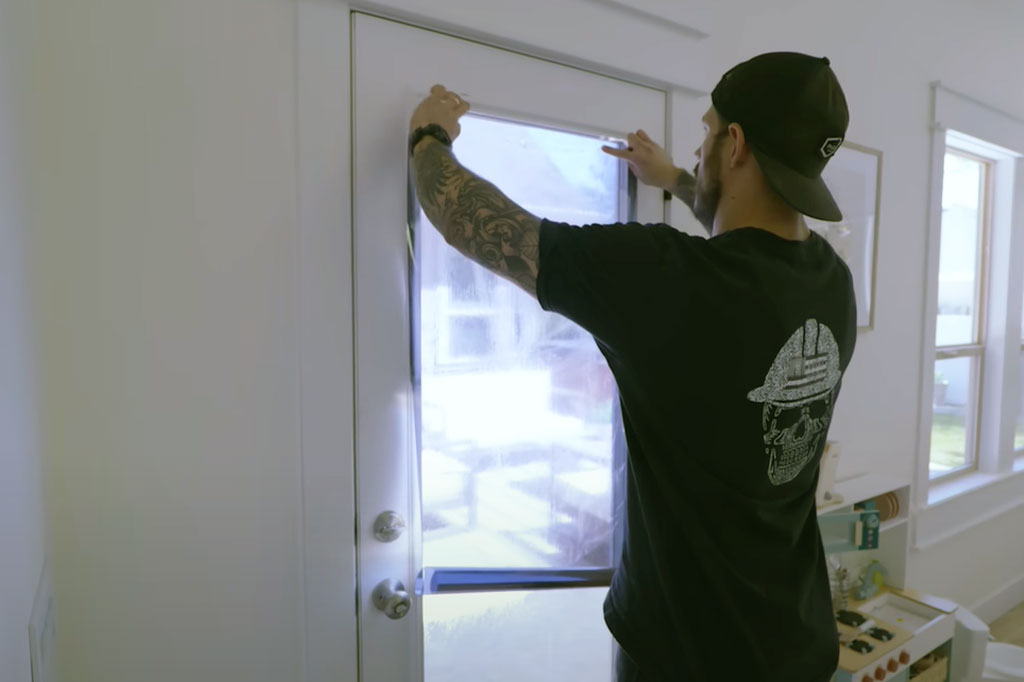
- Window Films or Tinting: Apply window films or tinting to reduce the amount of heat and UV radiation entering through the windows. These treatments can also enhance privacy and protect your furnishings from fading.
- Indoor Blinds and Curtains: Utilize blinds or curtains on windows to block sunlight during the hottest parts of the day. Choose light-colored or reflective materials to minimize heat absorption.
Improve Air Circulation and Fans
Enhancing air circulation can make a substantial difference in maintaining a cool environment upstairs. Consider the following suggestions:
- Ceiling Fans: Install ceiling fans in bedrooms and common areas to promote air movement. Set the fans to rotate counterclockwise during the summer for a cooling effect.
- Portable Fans: Use portable fans strategically to create airflow and increase comfort in specific areas. Place them near windows or doorways to bring in cooler outside air or position them to blow air out of the rooms.
Consider Window and Roof Upgrades
Upgrading your windows and roof can provide long-term benefits in terms of heat reduction and energy efficiency:
- Energy-Efficient Windows: Replace old, single-pane windows with energy-efficient options. Look for windows with Low-E glass, which reflects heat while allowing visible light to enter.
- Cool Roofing: Consider installing a cool roof that reflects more sunlight and absorbs less heat. Cool roofing materials can significantly reduce heat transfer, helping to keep the upstairs cooler.
Reduce Internal Heat Sources
Minimizing internal heat sources can alleviate the burden on your cooling system and contribute to a cooler upstairs environment:
- Appliance Usage: Avoid using heat-generating appliances during the hottest parts of the day. Limit activities such as cooking, laundry, and dishwashing to early morning or late evening when temperatures are cooler.
- LED Lighting: Replace traditional incandescent bulbs with energy-efficient LED lights. LED bulbs produce less heat, reducing the overall heat load in your home.
Conclusion
Keeping the upstairs of your home cool in the summer is a challenge many homeowners face. By implementing the strategies outlined in this guide, you can create a refreshing and comfortable living space even on the hottest days. From optimizing insulation and ventilation to enhancing air conditioning efficiency and utilizing shading techniques, every step you take can make a significant difference. Remember to maintain regular maintenance on your cooling systems and explore energy-efficient upgrades for long-term benefits. With a well-cooled upstairs, you can enjoy the summer season while staying comfortable and reducing your energy consumption.
-
What is the difference between an air conditioner and a refrigerator?
When it comes to cooling systems, air conditioners and refrigerators are two of the most common appliances that people use. Although they have similar functions, there are some significant differences between them. In this article, we will explore the differences between air conditioners and refrigerators, their components, how they work, and their energy efficiency.
Components
Air Conditioners
An air conditioner has four main components: a compressor, a condenser, an expansion valve, and an evaporator. The compressor compresses the refrigerant, which turns it into a high-pressure gas. This gas flows through the condenser, where it cools and turns into a liquid. The liquid then passes through the expansion valve, where it expands and becomes a low-pressure gas. The low-pressure gas then flows through the evaporator, where it absorbs heat from the air and cools it down. The cooled air is then blown back into the room by a fan.Refrigerators
A refrigerator also has four main components: a compressor, a condenser, an expansion valve, and an evaporator. The compressor compresses the refrigerant, which turns it into a high-pressure gas. This gas flows through the condenser, where it cools and turns into a liquid. The liquid then passes through the expansion valve, where it expands and becomes a low-pressure gas. The low-pressure gas then flows through the evaporator, where it absorbs heat from the inside of the refrigerator and cools it down. The cooled air is then circulated inside the refrigerator by a fan.How They Work
Air Conditioners
Air conditioners work by removing heat and moisture from the air inside a room. They use a refrigerant to absorb heat from the air and then release it outside. The refrigerant cycle described above is what allows the air conditioner to cool down the air in the room.Refrigerators
Refrigerators work by removing heat from the inside of the unit and releasing it outside. They use a refrigerant to absorb heat from the inside of the refrigerator and then release it outside. The refrigerant cycle described above is what allows the refrigerator to keep the inside of the unit cool.Energy Efficiency
Air Conditioners
Air conditioners can use a lot of energy, especially if they are not properly maintained or if they are used excessively. One way to improve energy efficiency is to use an energy-efficient air conditioner, which can reduce energy consumption by up to 50%. Another way to improve energy efficiency is to properly maintain the air conditioner by cleaning the filter, checking for leaks, and having it serviced regularly.Refrigerators
Refrigerators can also use a lot of energy, especially if they are not properly maintained or if they are used excessively. One way to improve energy efficiency is to use an energy-efficient refrigerator, which can reduce energy consumption by up to 40%. Another way to improve energy efficiency is to properly maintain the refrigerator by keeping it clean, checking the seal, and having it serviced regularly.Conclusion
In summary, while air conditioners and refrigerators have similar components and work in similar ways, they have different functions. Air conditioners are designed to remove heat and moisture from the air inside a room, while refrigerators are designed to remove heat from the inside of the unit. When it comes to energy efficiency, both appliances can use a lot of energy if they are not properly maintained or if they are used excessively. Therefore, it is important to choose an energy-efficient appliance and properly maintain it to reduce energy consumption and save money in the long run. -
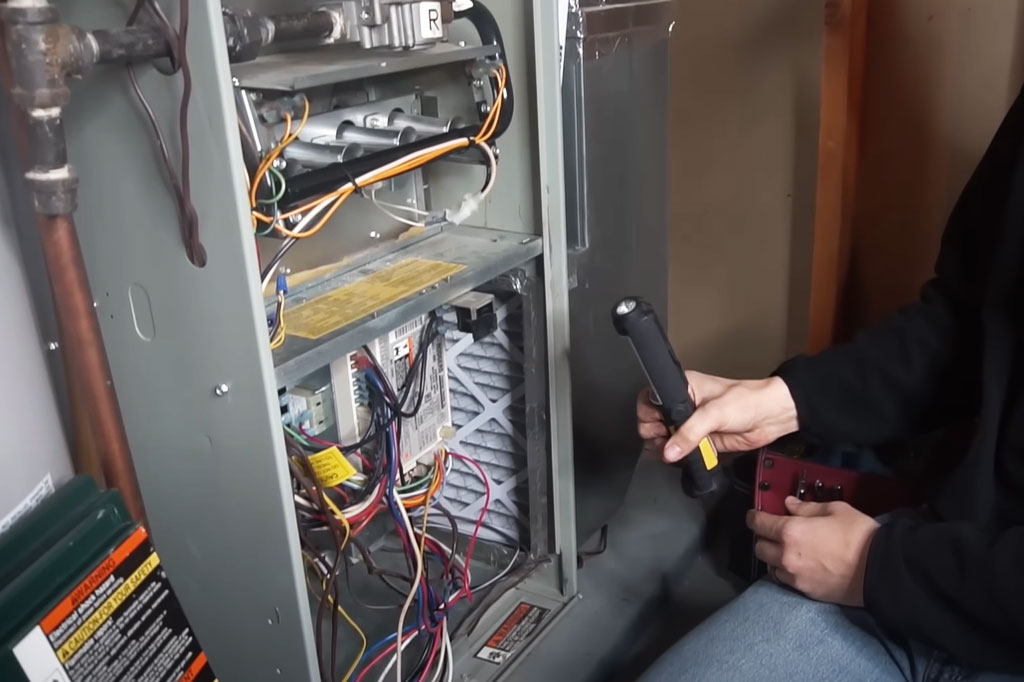
What signs to look for that indicate that need a furnace repair?
If you want to ensure that your furnace is running efficiently and effectively, consider scheduling regular maintenance. A professional can inspect your furnace, clean and replace filters, and ensure that everything is in working order. Regular maintenance can help prevent breakdowns and increase the lifespan of your furnace.
It’s essential to know what signs to look for that indicate that you need a furnace repair. In this article, we’ll explore the seven common signs that you need a furnace repair and what you can do to prevent them from happening.
7 Common Signs That You Need a Furnace Repair
1. No Heat
One of the most obvious signs that your furnace needs a repair is if it’s not producing any heat. This could be due to a faulty thermostat, a malfunctioning pilot light, or a broken heating element. Whatever the cause, it’s essential to get it fixed as soon as possible to prevent further damage.
2. Poor Air Quality
Another common sign that your furnace needs a repair is if the air quality in your home has declined. This could be due to a clogged air filter or a malfunctioning blower motor. If you notice an increase in dust, dirt, or allergens in your home, it’s time to call in a professional.
3. Unusual Noises
If you hear strange noises coming from your furnace, it’s time to call in a professional. This could be due to a loose belt, a broken fan blade, or a malfunctioning motor. Ignoring these noises can lead to more significant issues down the road.
4. Short Cycling
Short cycling is when your furnace turns on and off frequently. This could be due to a malfunctioning thermostat, a dirty air filter, or a clogged condensate line. Whatever the cause, it’s essential to get it fixed as soon as possible to prevent unnecessary wear and tear on your furnace.
5. High Energy Bills
If you’ve noticed an increase in your energy bills, it could be due to a malfunctioning furnace. An inefficient furnace can lead to higher energy bills, so it’s essential to get it repaired as soon as possible.
6. Yellow Pilot Light
If the pilot light on your furnace is yellow instead of blue, it’s time to call in a professional. A yellow pilot light is a clear indication that there’s a problem with your furnace, and it could be producing carbon monoxide.
7. Age of Furnace
Finally, if your furnace is over ten years old, it may be time to replace it. As furnaces age, they become less efficient, and they’re more prone to breakdowns. If you’re constantly repairing your furnace, it may be more cost-effective in the long run to replace it.
In conclusion, knowing the signs that you need a furnace repair can help you prevent further damage and save you money in the long run. If you’ve noticed any of these signs, it’s essential to call in a professional as soon as possible to diagnose and fix the issue.
Summary
If you’ve noticed any of the signs mentioned in this article, don’t wait to call in a professional. A furnace repair may be necessary to prevent further damage and save you money in the long run. Remember to schedule regular maintenance to keep your furnace running efficiently.
-
What are Programmable Thermostats and Is it important?
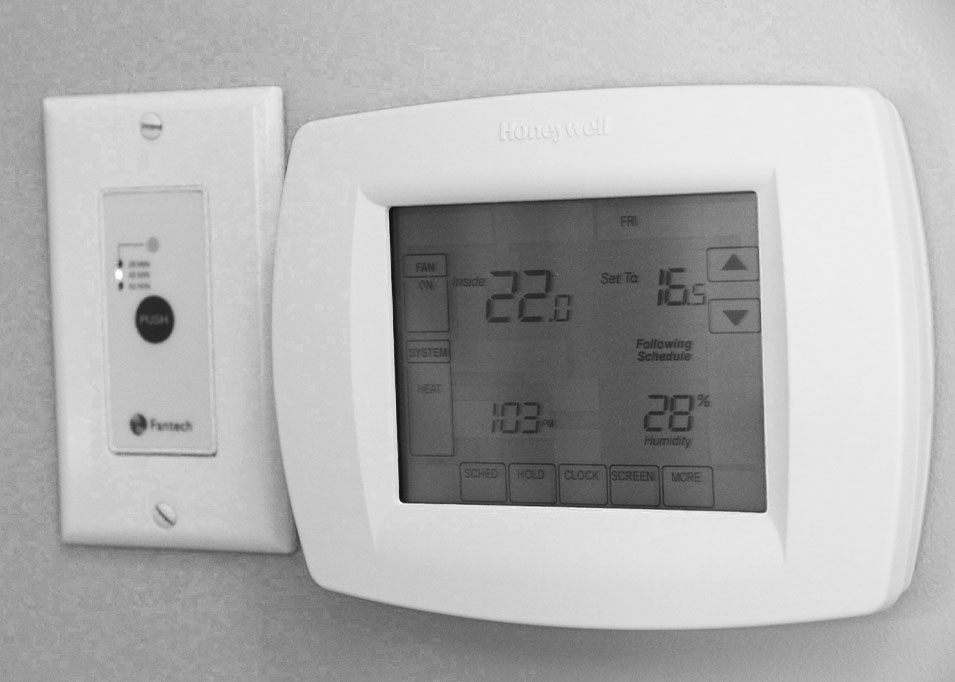
In the past, homeowners had to adjust the thermostat manually as desired. In modern homes, however, heating and cooling systems are automated to save energy and keep occupants comfortable. Programmable thermostats can be installed in these systems so that users can set temperature preferences throughout the day or week. The result is a home that’s more comfortable and energy-efficient. This guide will help you understand how programmable thermostats work, their benefits and how they are different from standard thermostats.
What is a programmable thermostat?
A programmable thermostat is an electronic device that is used to control your home’s heating and cooling system. These devices are installed in place of traditional mechanical thermostats and allow users to program a variety of settings and temperatures throughout the day. This lets you more efficiently regulate your home’s temperature and energy usage.
A programmable thermostat allows you to set a range of temperatures that you want each day. For example, you can set the thermostat to 68 degrees while you’re at work, then lower it to 62 degrees when you go to bed. This can save you up to 40% on your heating and cooling costs.
Unlike manual thermostats, programmable thermostats have a digital screen that you can use to set the temperature. You can program the times you want temperatures to rise or fall and set up a 7-day schedule for this, too. You can even set a timer on a programmable thermostat to make sure you don’t forget to change the temperature when you leave the house.
What are the main benefits of installing a programmable thermostat?
When you use a programmable thermostat, you’ll get a number of benefits:
Reduce energy costs: Having control over your thermostat can help you reduce your energy costs. Not only can you set your thermostat to energy-efficient temperatures, but you can also set it to automatically change throughout the day for when you’re home or away.
More comfortable: A programmable thermostat can help keep you more comfortable, even when the weather isn’t ideal. You can set your thermostat to change based on the temperature in your house, whether you’re home or away, weather, and even your schedule.
Convenience: Programmable thermostats allow you to set and change temperatures remotely through an app. This means you don’t have to be home to turn up the heat, or schedule your day around remembering to turn down the air conditioning.
Improved indoor air quality: By keeping your indoor temperature consistent and not too warm, you’ll avoid unnecessary energy use and save money.
How much money can my readers expect to save by using a programmable thermostat?
A programmable thermostat can save you up to 40% on your energy costs by keeping your indoor temperature consistent. This is because you’re using the thermostat to regulate the temperature in your home to a more efficient level. If you have an average monthly heating and cooling bill of $175, you can expect to save around $63 each month by using a programmable thermostat. This means you’ll save around $703 a year in energy costs. These savings are based on a fixed rate for energy, which is $0.16 per kWh. Since programmable thermostats can also help you save money on cooling costs too, you’ll see even greater savings.
What are the best settings to save money?
Using the right settings on your thermostat can help you save even more money. Here are some of the best settings to use:
Early-morning cooling: Many people use their air conditioner to cool their house in the early morning. However, this is inefficient and costs extra money.
Manual cooling: Instead, try to manually cool your home before you go to bed. This can be done by opening windows, turning down the thermostat, and closing blinds.
Afternoon cooling: You can use your air conditioner to cool your home in the afternoon during hot summer days. This is an ideal time to use it, as it’s when your utility bill will be the highest.
Is it safe to install a programmable thermostat yourself?
Most programmable thermostats are easy to install and don’t require a professional. You can do it yourself or ask a family member or friend for help. Just make sure that you follow the manufacturer’s installation instructions and that the thermostat has been approved for your particular system. If you don’t feel comfortable installing the thermostat yourself, you can hire a professional to do it for you. Installation costs vary based on your location and the contractor you hire. However, you can expect to pay an average of $80-$150 to install a programmable thermostat.
Is there a reason to get a programmable thermostat instead of a smart thermostat?
A smart thermostat is a programmable thermostat with added smart technology. Smart thermostats can connect to WiFi and allow you to control your thermostat from anywhere. Unlike programmable thermostats, smart thermostats allow you to create a custom climate in your home. You can set a schedule and program your thermostat to automatically change temperatures when you’re not home. This means that you don’t have to worry about manually changing the temperature throughout the day. On top of all this, smart thermostats also include sensors to help you save money by regulating temperature and keeping indoor air quality healthy. This makes a programmable thermostat something of a dinosaur in comparison.
Conclusion
The benefits of a programmable thermostat are many, and it can save you money on your energy bill and indoor environment. You can expect to save a significant amount of money by using a programmable thermostat, and it can make your home more comfortable and regulate indoor air quality. A programmable thermostat can be installed in most homes and is easy to program and use. You can expect to save a significant amount of money on your energy bill by using a programmable thermostat.
-
Ventilation Is Crucial to Air Quality – Why You Should care
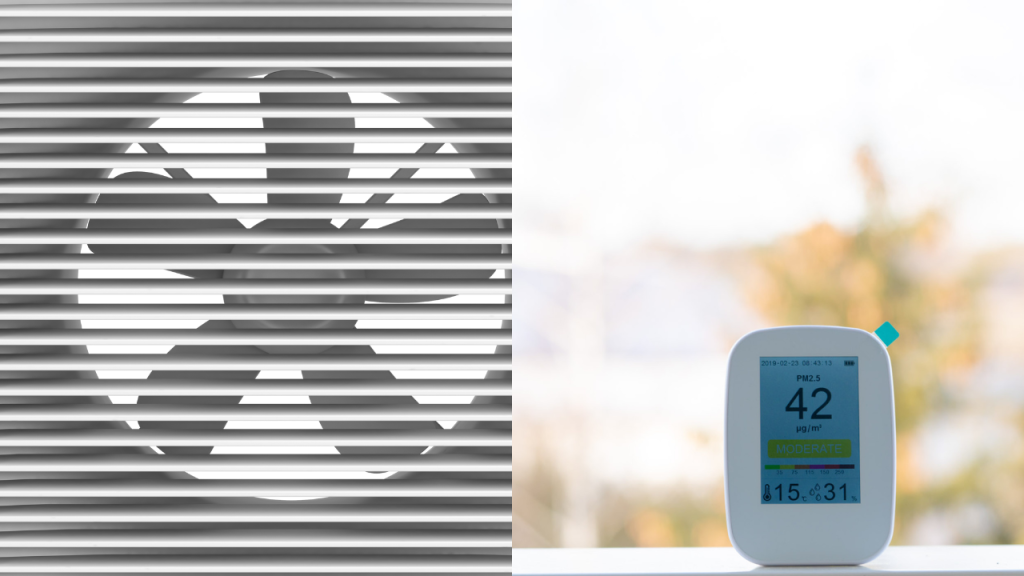
It is important to consider ventilation to ensure a clean and healthy environment in your home. You can control and maintain the air quality in your home in several ways. For example, the condition of your house could have a big impact on your health. You may have dust particles that build up in your air. These particles can cause health problems. For example, they may be inhaled into the lungs.

Ventilation System The dust that builds up in your home could affect your health. It may also lead to allergies, asthma attacks, coughing, and wheezing. It would help if you used a fan to circulate the air. You should also ensure that all of your home’s vents are working properly. If the vents in your home are leaking, it can lead to water damage inside your home. It would help if you made sure that the vents were sealed.
You can also use exhaust fans to help bring stale, contaminated air outside. This may help you to keep your home healthier. Ensure you turn on the exhaust fan as soon as the kitchen stove is turned on. Exhaust fans can help bring the air contaminated with smoke outside. You should also take care to avoid opening windows during heavy rainfall.
How Ventilation Ensuring Air Quality in Homes

Ventilation Ensuring Air Quality Clean Air Supply
When you are at home, two different types of air are circulating throughout your house. The air flows around the room, and then there is the air that comes from outside. We call the latter the outside air, which flows into your home through cracks and crevices in your house and walls.
Moisture Control
There is the inside air that you breathe in and outside air that you breathe in. The inside air gets moisture from the air that comes in through your windows and doors, and you can feel this moist air on your face and skin. This is a problem because it can cause allergies and infections. The outside air is dry and crisp, which helps to keep your home clean.

Moisture Control In cold climates, the outside air helps to prevent your home from getting cold. The air that comes through the windows and doors is warm and moist. It helps keep your home cool and makes it easier to keep the inside air clean. This helps to keep the moisture out.
Temperature Regulation
Your home can keep a certain temperature range for people to live comfortably. However, sometimes, it is too hot or too cold in your house.
Humidity control

Humidity control Home air circulation helps keep humidity levels in check, especially when cooking or showering. Good airflow dynamics achieved with proper venting strategies – no matter the size of the living space – can help prevent mold growth on walls/ceilings.
Heat exchange
Proper ventilation also helps to exchange heat between the outdoors and your home’s interior. As cold outside air is pulled into your house, it can help reduce humidity during warm weather and cool down hot spots during cold days. Similarly, as warmer inside air is vented out of your home, it can help prevent too much moisture from building up on windows and other surfaces due to condensation, which can lead to mold or water damage problems over time.
How can you keep the dust out of your home?
There are several ways that you can deal with the problem of dust and mold.
First, you can buy a dehumidifier. This is a machine that is designed to remove humidity from your air. It is a simple machine that only requires electricity. It is also recommended that you get a humidifier. This is a device that has a small reservoir that holds water.

keep the dust out of your home - The machine will produce humidity in the air if the reservoir has enough water. Humidifiers are also very easy to operate. In fact, you turn the tap and turn the machine on. You can use this device to purify the air of dust and mold.
- Second, you can use a central vacuum cleaner. These cleaners are designed to vacuum carpets, upholstery, and other furniture.
In conclusion, ventilation is crucial to air quality. Showing concern for the air we breathe and the environment is beneficial. Ventilation helps to remove harmful toxins and particles from the air and keep it clean.
-
Why You Shouldn’t Skip the HVAC in a Home Renovation
If you’re considering undertaking a home renovation, don’t forget to address the HVAC system. Maintaining a comfortable temperature in your home is essential and ensuring that your new additions – like new walls and floors – are properly air-sealing. In addition, you can avoid potential moisture problems and additional damage down the road by addressing the HVAC system before other repairs or additions.
What is an HVAC system and why is it important?
The heating, ventilation, and air conditioning (HVAC) system is responsible for maintaining the temperature and humidity in a building. When installed correctly, an HVAC system can save energy costs and help improve the comfort of occupants. Conversely, an improperly installed or malfunctioning HVAC system can increase energy costs and decrease the comfort of occupants. In order to ensure the proper operation of an HVAC system, it is important to understand its components.
An HVAC system typically consists of four main parts: the air handler, ductwork, registers, and coils. An air handler is a large machine with fans to move air throughout the building. The ductwork routes the heated or cooled air to the registers, where it flows into small rooms known as apartments or offices. Finally, the coils distribute heat throughout the room by dissipating heat through metal surfaces.
Benefits of having an HVAC system in your home renovation
Regarding home renovations, having an HVAC system is a key part of ensuring you have comfortable temperatures all year round. Here are some key benefits of having an HVAC system in your home:
- An HVAC system can keep your home at a comfortable temperature all year round. This is especially important if you live in a cold climate where the temperature can drop drastically at night or during winter.
- An HVAC system can also keep your home cool on hot days. If you don’t have an AC unit, using fans to circulate air will help to keep the house cool.
- An HVAC system can also help to reduce the amount of humidity in the air. A humid atmosphere is not only uncomfortable, but it can also increase the chances of respiratory problems.
When should you install an HVAC system in a home renovation?
An HVAC system is a vital part of any home renovation, but choosing the right time to install one is essential. Here are some guidelines:
- If you’re renovating an existing home, it’s best to wait until the entire project is completed and the home has been insulated and dry-fitted for accuracy. This way, you won’t have to worry about making changes later.
- If you’re building a new home, installing an HVAC system during construction will minimize pest and humidity problems down the road.
- In between renovations, always keep your HVAC system serviced and replace air filters as needed. Doing so will help ensure optimum performance during your next renovation.
Why should you not skip the HVAC in a home renovation?
The decision to install or replace your home’s heating, ventilation, and air conditioning (HVAC) system is a big one that can significantly impact your home’s comfort and energy efficiency. Here are six reasons why you should not skip the HVAC in a home renovation:
Comfort:
A poorly installed or old HVAC system can leave you feeling hot and sweaty all year round. A properly functioning system can keep your house at a pleasant temperature all year round, making it much more comfortable to live in.
Energy efficiency:
A properly working HVAC system can keep your home comfortable and reduce energy bills. A poorly installed or old system can result in higher utility bills (and also a more expensive replacement)
Safety concerns:
A poorly installed HVAC system can put you and your family at risk of serious harm. A properly installed system will protect you from carbon monoxide poisoning and other health risks.
Home value:
A properly functioning HVAC system can increase the value of your home. A poorly installed or old system can make your home less valuable than it could be.
Durability:
A properly installed HVAC system is meant to last a long time. A poorly installed or old system can make your home more susceptible to damage.
Service life:
A properly installed HVAC system can last up to 20 years or more. A poorly installed or old system can make your home less durable and short-lived.
Conclusion
It is important to remember that a home renovation should not just be about updating the exterior look but also updating the HVAC system. By updating the HVAC properly, you can ensure that your home is comfortable all year long and that you are not putting your family at risk for illness.
-
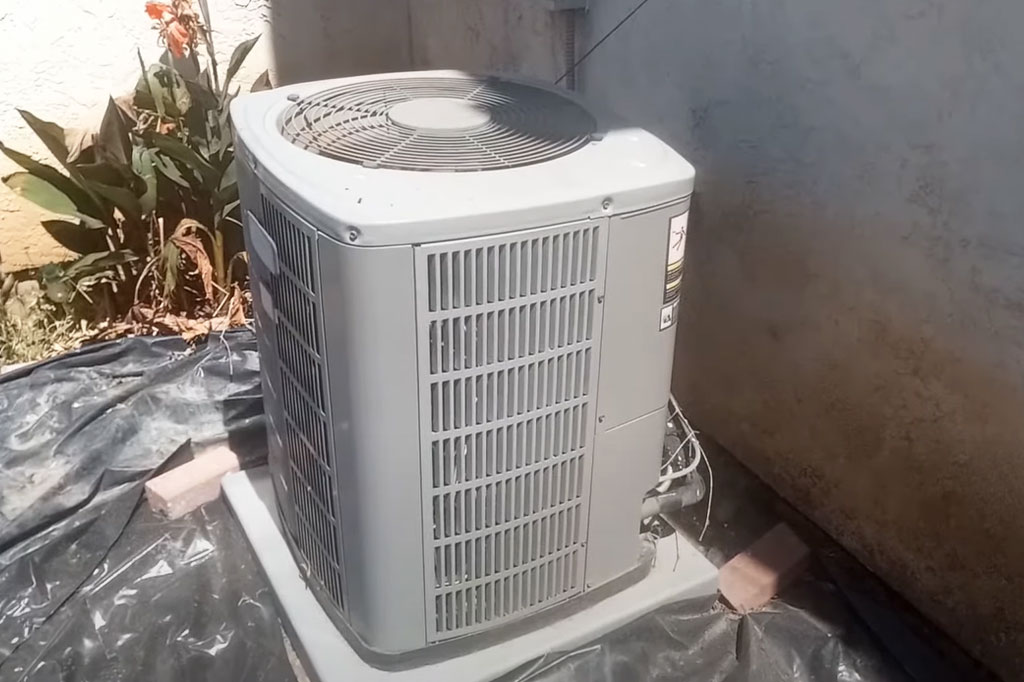
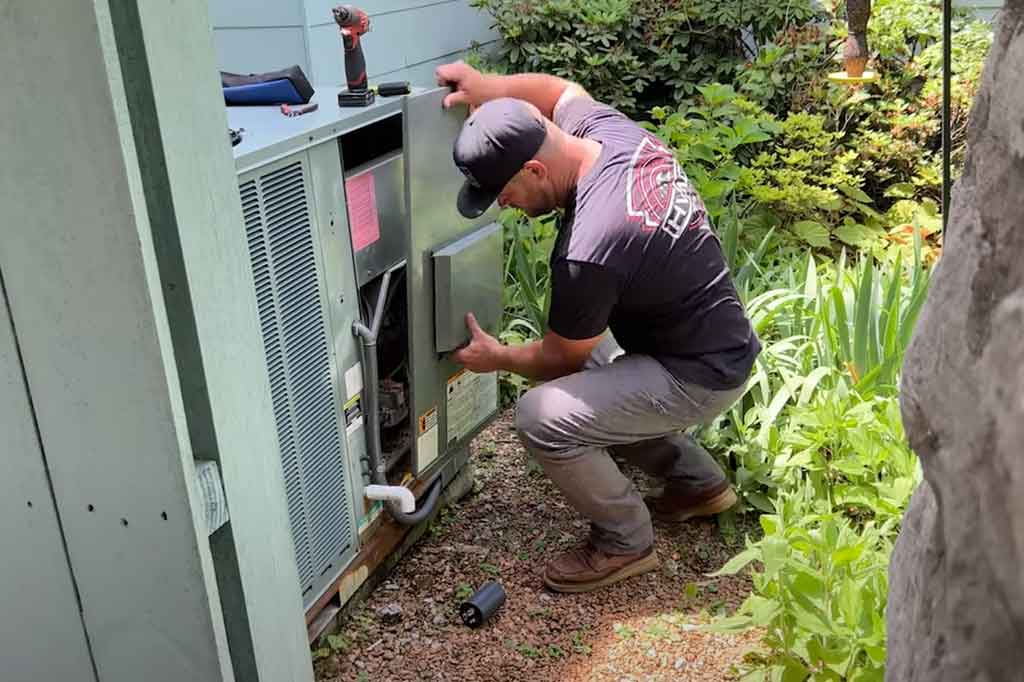
How to Reset Your Outside AC Unit: Helpful Tips for Every Homeowner
Your air conditioner is one of your most valuable appliances, so it’s important to keep it working properly. Here are some quick tips for resetting an outside AC unit.
How to Reset Your AC Unit
When it comes to your AC unit, you want to make sure that it’s working as well as possible. Here are a few steps that can help:
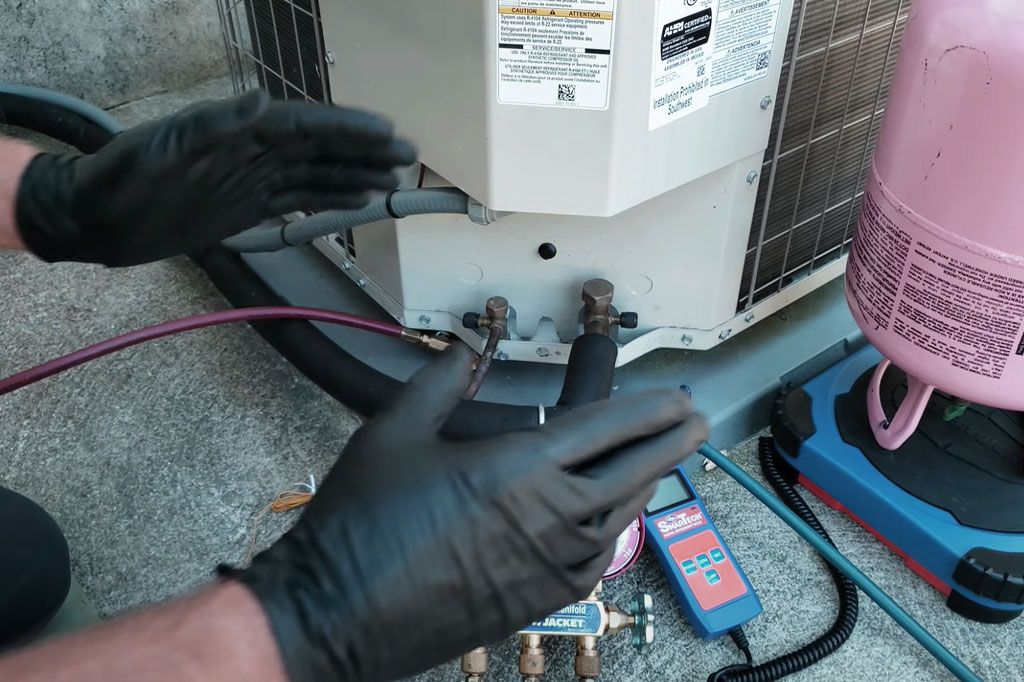
- If the AC isn’t turning on, check the power supply (the cord). If there is no voltage at all coming through the plug, then you’ll need to have a technician come out and fix the issue for you.
- If your AC isn’t cooling or heating properly, then check for leaks around windows or doors where the air gets into these vents. Also, look for drafts from any open doors or windows in order to find where fresh air could be entering before reaching its destination inside of your home. To prevent this from happening again once repaired/fixed later down this road (and also because it’s kind of gross), consider sealing any cracks with caulk or silicone caulk before putting everything back together again!
Unplug the unit
Before you begin, make sure to unplug each individual component of your AC unit. This will help prevent electrical damage and injury, in addition to keeping you safe from electrocution or fire.
Cut off the power to the outside unit
Once you’ve disconnected the circuit breaker or disconnected the switch, turn off the main power to your house by going through a fuse or shutting off the breaker box. Be sure that no one is in an area where they can trip over something if they walk into your home while this is happening. Next, unplug any electrical devices connected directly to your AC unit (such as fans). Finally, use pliers to twist off any screws holding on wires coming from outside of your house and remove them from their plugs so they won’t get damaged during this process.
If none of these steps worked for you, call an electrician first! Your local utility company may offer services for resetting outside AC units;
Open the unit’s cabinet
You can open the outside AC unit’s cabinet by removing the cover, which is usually held in place with screws. After you unscrew all of those screws, lift up on the top cover and set it aside—you may have to pry off a few of its retaining clips before getting it open. Once your cover is removed, pull out as much air from inside as possible by opening all but one window or door at once (this helps prevent condensation from forming). Then remove any loose debris from inside using an old towel or vacuum cleaner hose; if there are any bugs flying around, make sure they don’t end up in your vents!
Next, Unplug power cords from both sides of your unit before opening anything else so no ground wires get pulled out along with them!
Find the disconnect switch or circuit breaker
You’ll first want to find the disconnect switch or circuit breaker. This is typically located somewhere on the outside of your unit and may be marked with a letter, number, or other symbols. If you can’t find it easily, check inside as well—sometimes they’re hidden behind panels or under covers.
Once you’ve identified where this switch is located, follow these steps:
Turn off power at its source (elevator control panel). This will help prevent any damage from occurring during an accidental resetting of your AC unit’s controls or shutoff feature (which could cause injury). Once power is safely turned off, unplugging from receptacle(s) will also allow for proper resetting procedures without risk of shock when reconnecting later on down below.”
Locate the motors reset button
The first step is to locate the motor’s reset button, which can be found on the front panel of your AC unit.
The reset button is generally located at the base of your unit and will have a red dot on it, as well as an obvious letter or number label (e.g., “R”).
Plug or turn on the power again
If you’ve already plugged in your AC unit, it’s time to turn it back on and see if that helps to reset your thermostat. If not, move on to step 3 below!
Set your thermostat to COOL
- Set your thermostat to COOL.
- To set your thermostat to COOL: Press and hold the “COOL” or “WARM” button on top of the unit until you hear a clicking sound, then release all buttons at once.
- Why it’s important to set your AC unit to cool: When an AC unit is kept at high settings for long periods of time (like we’ve been doing), it can become uncomfortable for some people and even cause them to develop headaches or other health problems in their home. By setting your AC unit back down into its normal range—which should be below 72°F—you’ll reduce these health risks as well as save money on utility bills!
Keep your AC working smoothly!
If you’re like me, the thought of having to put up with an old AC unit for much longer than I have to is enough to make me want to take matters into my own hands. Fortunately for us homeowners, resetting your outside air conditioner isn’t as complicated as it may seem at first glance. In fact, there are several helpful tips and tricks that can help keep your unit running smoothly all year round—and even beyond!
Conclusion
The AC unit is an essential part of your home, and it’s important to keep it running at its peak performance. Taking the time to reset your AC unit is a good way to ensure that this doesn’t happen again. If your unit gets stuck on one setting and can’t switch back to “cool mode,” then it may be time for a new one!
-
Mold vs. Mildew: How to clean both

Mold and mildew are two types of fungi that can cause problems in the home. Mold is often black, green, or white and can cause various health problems if breathed in. Mildew is also often white but can change color to indicate its level of infection. Both mold and mildew need to be cleaned up regularly to prevent them from causing damage.
How to identify mold and mildew: Where can it grow?
Mold and mildew are two types of fungi that can cause health problems if they grow too large or are not treated. Mold is a fungus that lives in warm, moist areas like your home or office. Mildew is a fungus on surfaces like clothes, furniture, or walls. You can identify mold and mildew by their look and smell. Mold often has a dark gray or black surface, while mildew looks white or cream-colored and has a strong odor. To avoid getting sick from mold or mildew, you should clean the area where the fungus is growing regularly and use an air filter to reduce the amount of dust and other particles in the air.
Mold and mildew can grow in various places, but they are particularly common in moist and warm environments. In homes, mold and mildew can often be found on ceilings, walls, floors, furniture, and other surfaces. They can be especially harmful to people with asthma or allergies because they cause respiratory problems. Mold and mildew can also be hazardous to the environment if they are not properly cleaned up.
What is the difference between mold and mildew?
Mold is a type of fungus that thrives in moist conditions. Outdoors mobilizes anything they can find to survive, such as plants or dead leaves. Indoors, moisture also increases the risk of mold growth on furniture, walls, or building materials. You might notice mold growing on a surface, but it most likely won’t remain in one place. Molds will often cause spores to disperse, drifting in the air and landing in other locations.
Mildew is the common name for various species of mold, which are light in color, such as white, gray, or green. Mildew most often refers to the powdery, slightly light-colored mold, such as white, gray, or green.
How to clean mold and mildew?
Mold and mildew are two common indoor pests that can be difficult to eliminate. Here are some tips on how to clean mold and mildew:
- Use a bleach solution: Mix 1 part bleach with 9 parts water and pour it into a spray bottle. Spray the mold and mildew areas liberally, using a circular motion. Let the solution sit for a few minutes before rinsing off with water.
- Use an enzyme cleaner: Pour 1 cup of white vinegar into a large bowl and add two tablespoons of household enzyme cleaner. Stir until the mixture is uniform. Next, pour the mixture over the mold and mildew areas using a sweeping motion. Let the enzymatic cleaner work its magic for 30 minutes before rinsing off with water.
- Use hydrogen peroxide: Pour a cup of hydrogen peroxide into a bucket and mix in 1 tablespoon of bleach. Let the solution sit for about 20 minutes, then soak the moldy area with a spray bottle full of the solution. Let the solution sit for a few minutes before rinsing off with water.
- Use a bleach solution: Pour 1 cup of bleach into a bucket and mix in 2 tablespoons of household bleach. Let the solution sit for about 20 minutes, then soak the moldy area with a spray bottle full of the solution. Let the solution sit for a few minutes before rinsing off with water.
- Use a vinegar solution: Pour 2 cups of white vinegar into a bucket and mix in 1 tablespoon of bleach. Let the solution sit for about 20 minutes, then soak the moldy area with a spray bottle full of the solution.
Conclusion
It is important to know the difference between mold and mildew when cleaning. If you are unsure which one your room may be afflicted with, it is best to consult a professional.
-
How to Clean Window Air Conditioners
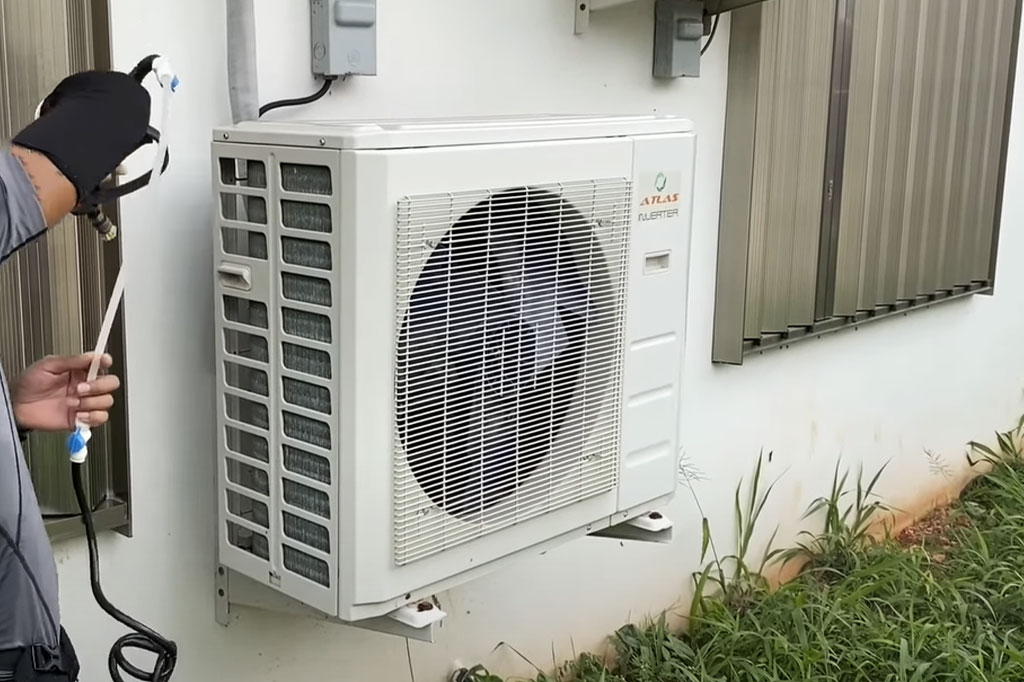
Window air conditioners are one of the most common pieces of equipment in a home. Unfortunately, they’re also one of the most often neglected. If your window air conditioner is not working right, it can be a very uncomfortable summer day. So, we’ll discuss here how to clean a window air conditioner.
Why do You Need to Clean Your Window AC Unit?
Window air conditioners are a significant part of any summertime cooling regimen. They help keep your home at a comfortable temperature, but they can also be a major source of allergens and pollutants.
To keep your window AC unit in top condition, it needs to be cleaned regularly. Here are some reasons why you should clean your window AC unit:
– It Keeps Your Air Conditioning System Running Smoothly
A clogged air conditioning system can cause problems from start to finish. It could produce inaccurate temperatures, make it difficult to breathe, and damage your AC unit itself. A regularly cleaned AC unit will run more smoothly and likely last longer than one that isn’t regularly cleaned.
– It Prevents Mold and Mildew
Mold and mildew are the worst things to your air conditioning system. They can cause great damage in just a short amount of time. Cleaning your AC unit regularly will help prevent mold and mildew from forming.
– It Prevents Insects and Rodents
Like most people, you probably don’t want to think about bugs in your home. However, they can cause quite a bit of damage in just a short time.
How Often Should a Window AC Unit Be Cleaned?
Window air conditioners are a big part of summer comfort. But they can also be a big source of dust and pollen. The average American household spends about $1,000 per year on air conditioning. That’s a lot of money to pay to keep your home cool! So it’s important to ensure your window AC unit is clean and operating at its best. Here are some tips for cleaning your window AC unit:
- Once a month, clean the filters on your window AC unit.
- Once a year, clean the compressor and fan motor on your window AC unit.
- If you notice that the window AC unit is not cooling your home as efficiently as it used to, schedule an appointment to clean it.
Step by Step Instructions On How To Clean A Window Air Conditioning Unit
Window AC units can become dusty and dirty over time. To clean it, follow these simple steps:
- Disconnect the unit from the power source and remove any plug covers or screws holding it to the wall.
- Remove the unit’s front grille and remove any dust or debris trapped inside.
- Remove the filter and wash it in a mild soap solution.
- Use a vacuum cleaner to clean the unit, following the manufacturer’s directions.
- Clean the evaporator coil with a brush or vacuum cleaner.
- Use a damp cloth to clean the unit’s interior.
- Use an air compressor with a hose to blow out any dust trapped in the unit (use a can of compressed air for this).
- Rinse the unit with water and dry it thoroughly before using it again.
Conclusion
It is important to clean window air conditioners regularly to keep them clean and in good working order. Additionally, it is important to follow specific cleaning instructions to ensure that the air conditioner remains functioning properly.
-
Subscribe
Subscribed
Already have a WordPress.com account? Log in now.
